
Reference · Desktop and system
Sound for creators
Recording, streaming and producing: buffers, OBS, a separate game track, DAWs.
On this page
What it is
What works out of the box for people who record, stream or produce, what one command adds, and the three things to know before a session. A buffer is the small batch of sound the computer prepares before it plays it; smaller means less delay, larger means fewer clicks. A track is one recording you can edit on its own, such as the game's sound or your voice.
Why
Creators need two things from sound that everyday users do not: tiny buffers while monitoring, and separate tracks for the game and the voice. Both are choices, so they are switches, not defaults.
How
- Install the tools. Tick Creative Apps in the installer, or install the Creative module in Settings > Modules: it adds OBS Studio, Ardour, Audacity and the piece music apps need. See Creative apps in one step.
- Check the sound: run
wol audio doctorin Terminal. You see the default input's level, dropouts, forced buffers and the streaming pieces, each with the fix. - Pick the buffer for the job in Settings > Sound > Pro Audio: 64 samples for monitoring through a music app, 256 for a stream, automatic for everything else. See Low-latency sound.
- Give the game and your voice their own tracks: run
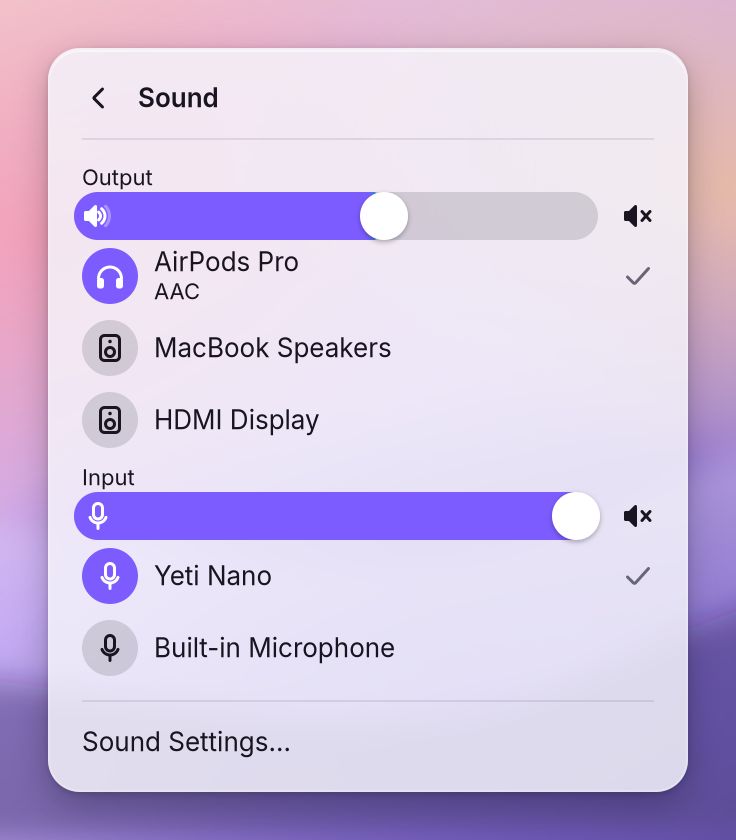
wol audio appmix on, send the game to WolOS App Mix with the game's own output picker, and add both in OBS (details below). Choose your microphone in Control Center > Sound, or in Settings > Sound > Input.
If something goes wrong
| What you see | What to do |
|---|---|
| The microphone clips | Run wol audio doctor; it names the input level and the fix. Keep the slider at or below 100% unless you need Allow Louder. |
| Dropouts while monitoring | Raise the buffer in Settings > Sound > Pro Audio (64 frames for monitoring through a DAW, 256 for a stream). |
| OBS does not see the game audio | Run wol audio appmix on, send the game to WolOS App Mix, and capture it in OBS. wol audio appmix status says which pieces exist. |
| Flatpak OBS cannot reach sound | flatpak override --user --filesystem=xdg-run/pipewire-0 com.obsproject.Studio; the native package is simpler. |
Related
Low-latency sound · Creative apps in one step · Sound · Optional modules
Reference
What works out of the box on WolOS, what one command adds, and the three things to know before a session. The rules behind it are in modules/audio.md.
Before you record
- 100% is 0 dB. The input slider's top is the microphone's nominal level, not the hardware maximum. If a mic is quiet at 100%, turn on Allow louder (Settings > Sound > Output; one switch for both the output and the input slider, which then reach the hardware maximum and mark 0 dB with a tick) and watch the meter in Settings > Sound > Input; red means clipping.
- Check the stack:
wol audio doctor. It names the default input's level in dB, dropouts, forced buffers and the OBS pieces, each with the fix. - Pick the buffer for the job in Settings > Sound > Pro Audio: 64 frames (1.3 ms) for monitoring through a DAW, 256 for a stream, automatic for everything else. The choice is written to
~/.config/pipewire/pipewire.conf.d/50-wolos-pro-audio.confand applied live; it survives a reboot andwol audio resetremoves it.
OBS Studio
Install OBS (pacman -S obs-studio) and the PipeWire audio capture plugin (pacman -S obs-pipewire-audio-capture, from the [wolos] repo). The plugin adds three sources: Application Audio Capture (one app, picked by name), Desktop Audio Capture (what the speakers play) and Audio Input Capture (PipeWire). Screen and window capture use the compositor's portal (xdg-desktop-portal-hyprland): OBS asks, you pick.
Game audio and voice on separate tracks. wol audio appmix on creates an output called WolOS App Mix and a source called Mic + App Mix:
- send the game or the browser to WolOS App Mix with the app's own output picker (Settings > Sound has no per-app list); you still hear it on your speakers or headset;
- in OBS add Application Audio Capture on WolOS App Mix for the game track and Audio Input Capture on your microphone for the voice track, or one Audio Input Capture on Mic + App Mix when a single mixed track is enough.
wol audio appmix off removes both; wol audio appmix status says which exists. They are pipewire-pulse modules, so they go away with a logout too.
Flatpak OBS needs the PipeWire socket: flatpak override --user --filesystem=xdg-run/pipewire-0 com.obsproject.Studio. The native package is simpler.
Voice: automatic level and noise
Settings > Sound > Input has two switches. Automatic input level puts WebRTC gain control, noise suppression and echo cancel in front of the microphone; the result is a new input, WolOS Microphone, which becomes the default so every app uses it. Reduce background noise adds the RNNoise filter (noise-suppression-for-voice, on the image) and shows up as WolOS Microphone (noise reduced). Both are loaded only while switched on. For OBS, pick the processed input as your microphone source.
DAWs and JACK apps
pipewire-jack is the JACK on the image: Ardour, Reaper, Bitwig, Carla and friends see PipeWire as a JACK server with the buffer you chose in Pro Audio. Realtime scheduling comes from rtkit, and members of the audio group have rtprio 95 / memlock unlimited directly (/etc/security/limits.d/70-wolos-audio.conf). A USB interface keeps its hardware mixer (preamp gain in the interface's own knob), and its card can be switched to the card profile Pro Audio, which exposes every channel raw and bypasses the automatic routing. Settings > Sound > Pro Audio sets only the rate and the buffer; the card profile is a command: pactl list short cards names the card, then pactl set-card-profile <card> pro-audio (and back to output:analog-stereo+input:analog-stereo, or whatever the card listed before, to return).
Sample rate: the graph runs at 48 kHz but follows 44.1, 88.2 and 96 kHz streams instead of resampling them; force one in Pro Audio for a whole session. Dropouts show as xruns in Pro Audio and in wol audio doctor; the fix is a larger buffer, another USB port, or a powered hub.
Bluetooth headsets
The best codec the headset offers wins (LDAC, aptX HD, aptX, AAC, SBC-XQ). Recording through a Bluetooth headset switches it to the call profile (HFP, lower quality) only while an app records, and back afterwards; the input level meter in Settings does not count as an app recording; turn Use the headset microphone automatically off in Settings > Sound (Bluetooth section, shown while a Bluetooth device is connected) if you prefer to keep music quality and use another microphone. The codec can be chosen per device.
When something is wrong
wol audio doctor: the checks and the fixes.wol audio reset: shows what a reset would do;wol audio reset --yesforgets stored defaults and volumes, removes the Pro Audio file and restarts PipeWire. Your apps reconnect by themselves.- Settings > Sound > Troubleshooting has the same reset, Keep device awake (for amplifiers that click when PipeWire suspends them) and Ignore hardware volume (software volume for a device whose mixer lies).
Related
- SoundOne sound server with rules that keep microphones from clipping, low latency where it matters, and a choice of Bluetooth codecs.
- Optional modulesAI, developer, creative and console stacks, installed after the base and removable.
- 0032: Optional modulesAI, developer, creative and console stacks as removable modules and Kits.
- Creatives
- The wol commandEvery wol command, what it does, and which ones helpers may call.
From the developer documentation, wonderlandos/wolos docs/creators-audio.md.