
Start here
Installing WolOS
Erase a disk, share it with Windows or Linux, or lay out partitions by hand. Nothing is written before you confirm the summary.
On this page
What it is
Install WolOS is the installer on the live USB stick. It asks a few questions, explains each page in plain words (what will happen, what is kept), and ends with a summary of exactly what will change. Nothing on the computer is touched until you click Install on that summary. At the first menu you can also choose Try WolOS, which runs the desktop from memory and changes nothing.
Think of the installer as a builder who walks through the house with you, writes down every wall that will move, and only starts when you sign the list.
Why
A wrong step in an install can destroy someone's files. So the installer does not act page by page. While you answer the questions it writes down a plan that names every One part of a disk with its own space. Windows and WolOS can each have their own on one disk. it may touch, shows you that plan as the summary, and only then starts. If anything else on the disk changed in the meantime (another program, a disk plugged in), it stops instead of guessing.
How
Before you start. You need a computer that starts with The modern kind of firmware every recent PC has. WolOS needs it to start., at least 16 GB of free disk space, and WolOS on a A small plug-in drive. Writing WolOS onto one erases what it held. or attached to a A pretend computer inside a program on your real one, good for trying a system safely. (Getting started). Plug a laptop into power. To keep Windows, read Installing next to Windows first.
Every installer page has the same frame: a picture and a title at the top, a sentence saying what the page decides and what comes next, the choices, and Back and Continue at the bottom. Back never loses what you entered on later pages.
Start from the stick and choose Install WolOS. You see the welcome page: "Install it on this computer, or try it first. Trying changes nothing." Try WolOS (1) opens the desktop from the stick; you can start the installer from there later. Install WolOS (2) opens the installer. If the computer has A check built into the computer that starts only signed software. WolOS can use it with keys made for this computer only. on, it shows one blue screen before this page; see Secure Boot.
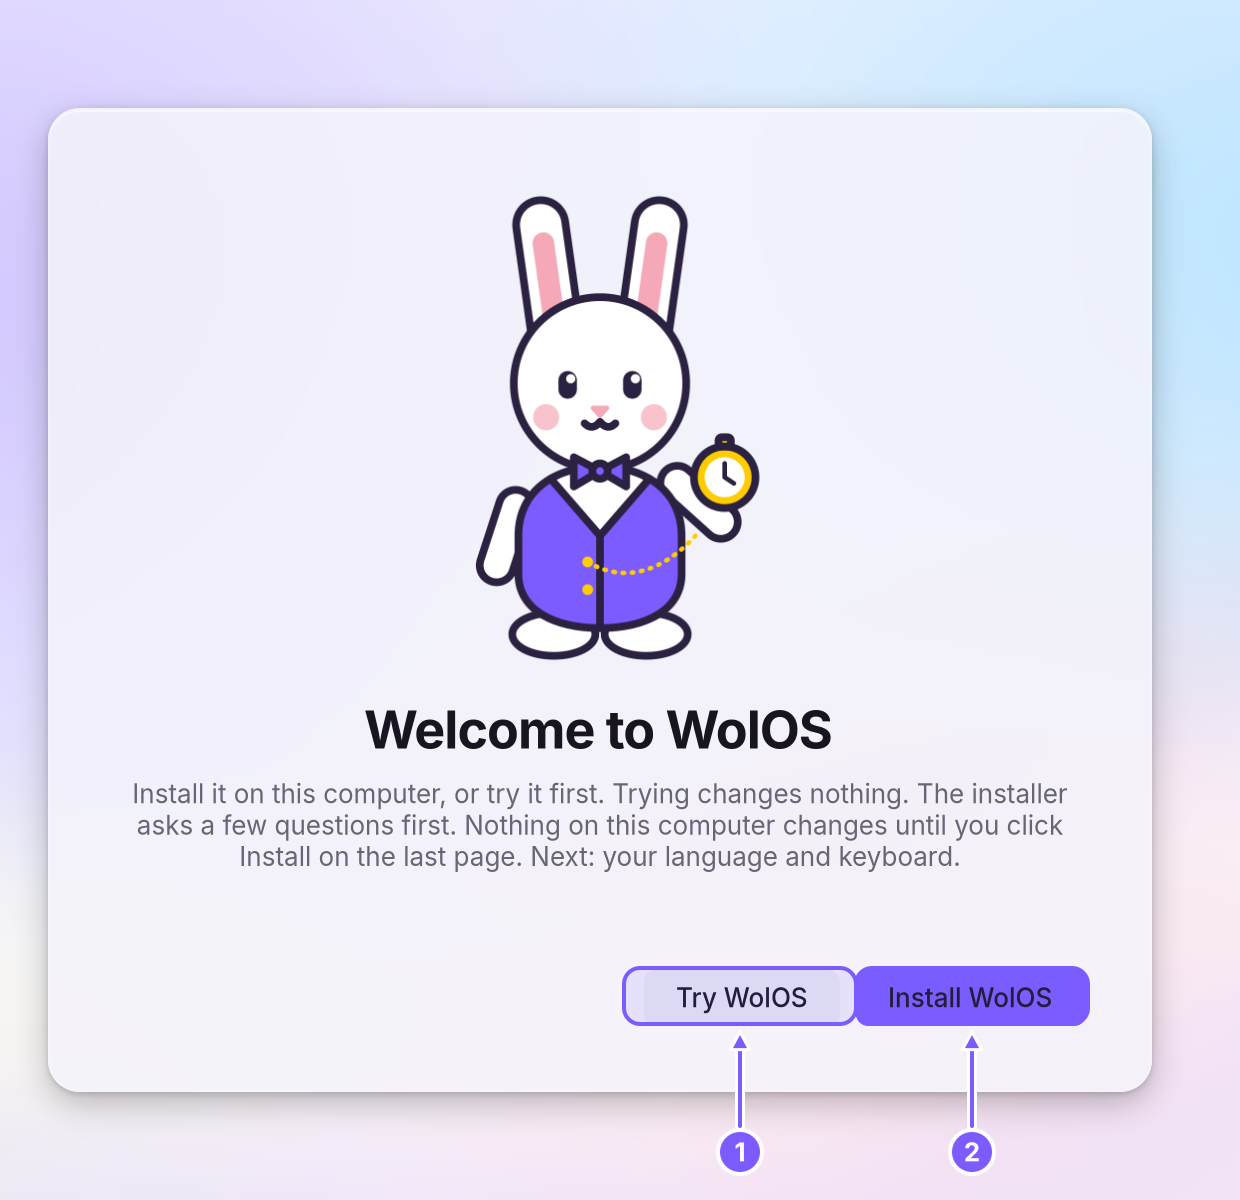
Choose your language and keyboard. You see "Choose your language and the keyboard you type on." Click your language in the list (1); the country next to it decides the date format and the spelling. The Keyboard menu (2) follows the language; change it if the letters printed on your keys are a different layout. Type a few letters, including ones special to your language, in Try it (3) to check that the keys type what you expect, then click Continue (4). Both can be changed later in System Settings (Language & Region and Keyboard).
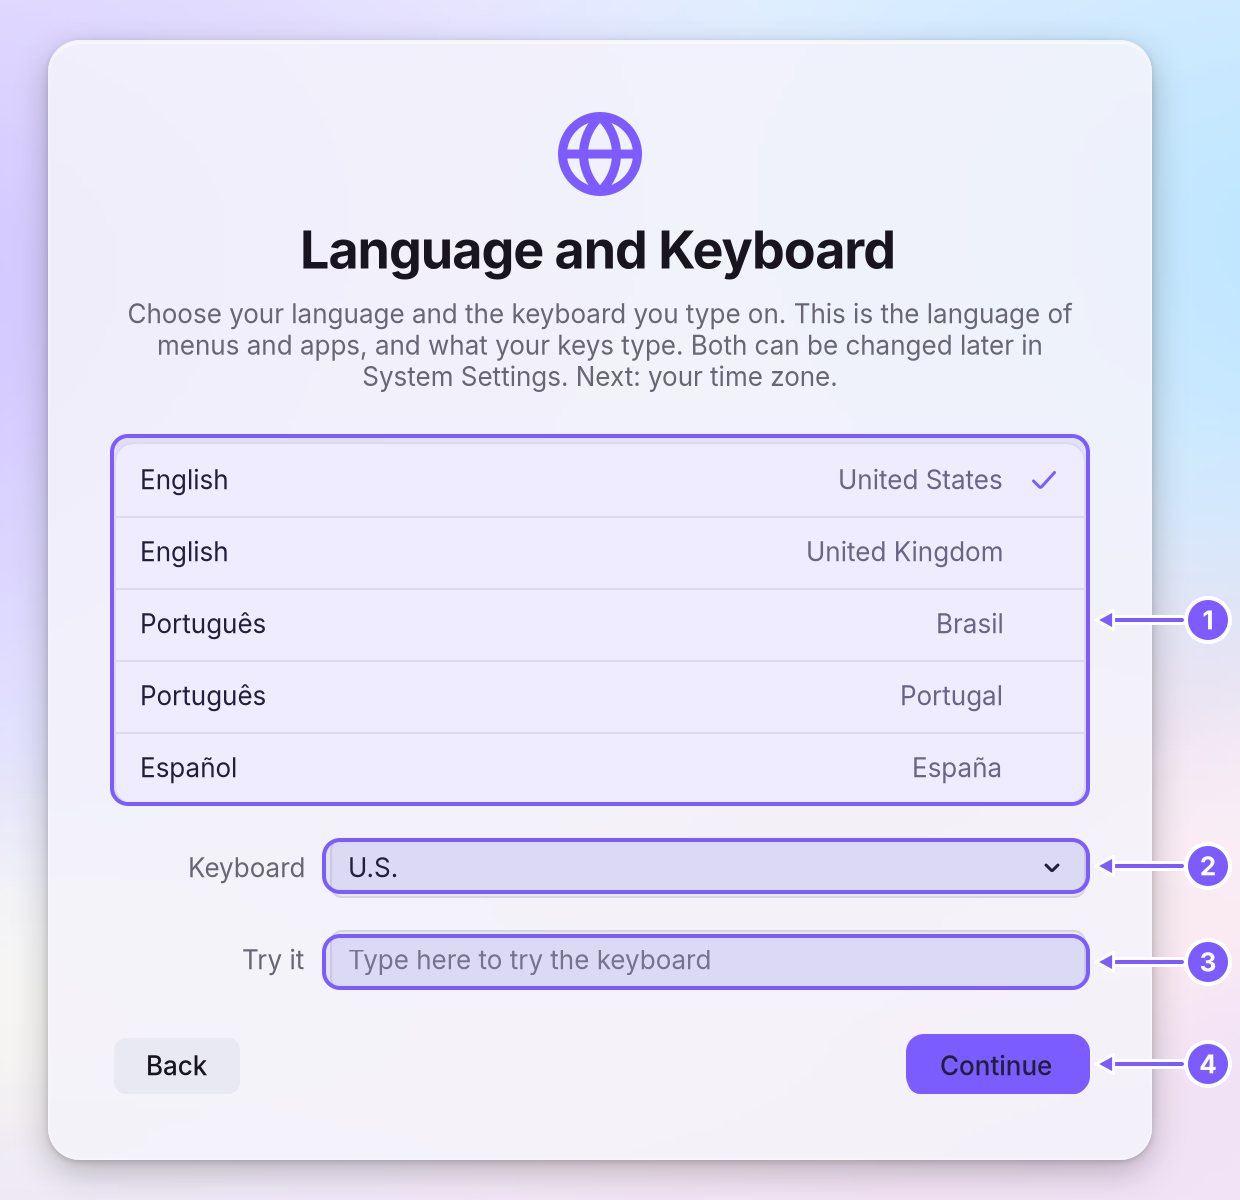
Choose your time zone. You see "Your clock follows this place." Type a big city near you in the search field (1): the list (2) shrinks as you type. Click the city in your The region whose clock you follow, so the time in the menu bar is right where you live., then Continue (3). When the computer is online, the installer ticks a guess for you.
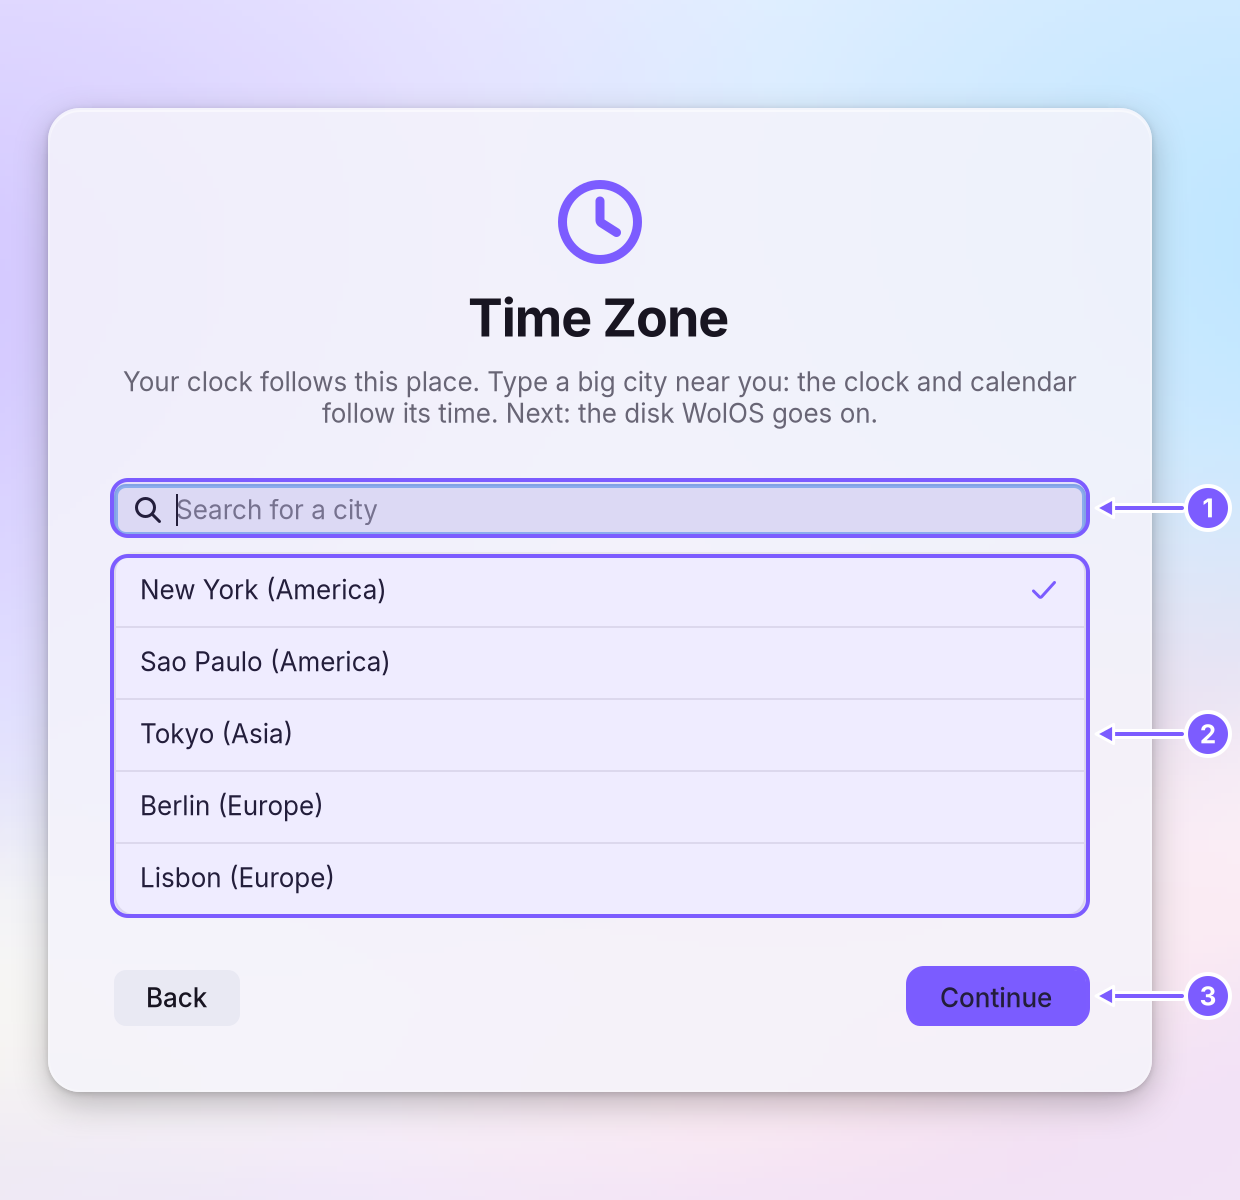
Choose the disk. You see "Choose where WolOS goes." Each disk in the computer has one row with its name and size; click the one WolOS should go on, then Continue. The stick you started from, CDs and read-only disks are never listed, and a disk under 16 GB is refused. If no disk shows, connect it and click Look Again.
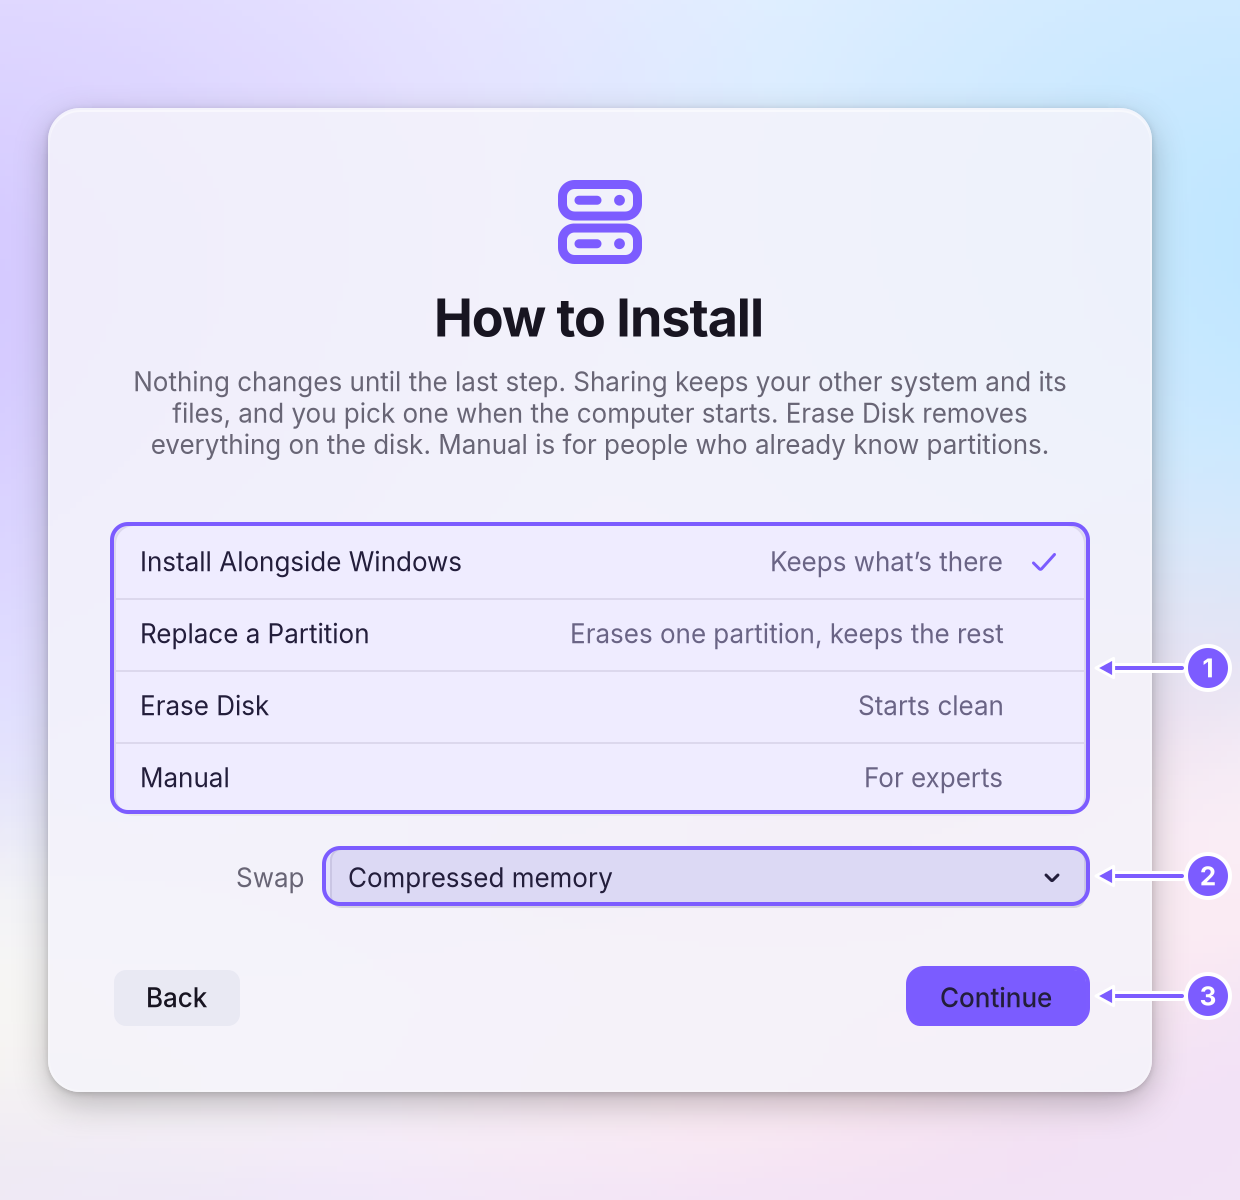
Choose a method. You see "Nothing changes until the last step." Click one of the four ways in the list (1), check the Swap menu (2), then Continue (3):
- Erase Disk uses the whole disk. The page names what is on it ("This disk has Windows on it. Erasing removes it.").
- Install Alongside shrinks your other system and puts WolOS next to it. A slider ("Drag to choose how much room each system gets.") splits the room. See Installing next to Windows.
- Replace a Partition erases one partition and keeps the rest of the disk.
- Manual is for people who know partitions: create, delete and resize them, give each a job (system, startup files, your files
/home, swap, another folder), choose whether to erase it, and keep an existing/home.
The Swap menu chooses where the computer puts things when its memory is full. Compressed memory (the default) packs them in memory and is right for almost everyone; a swap file on the disk is for computers with little memory that you want to put to sleep for a long time.
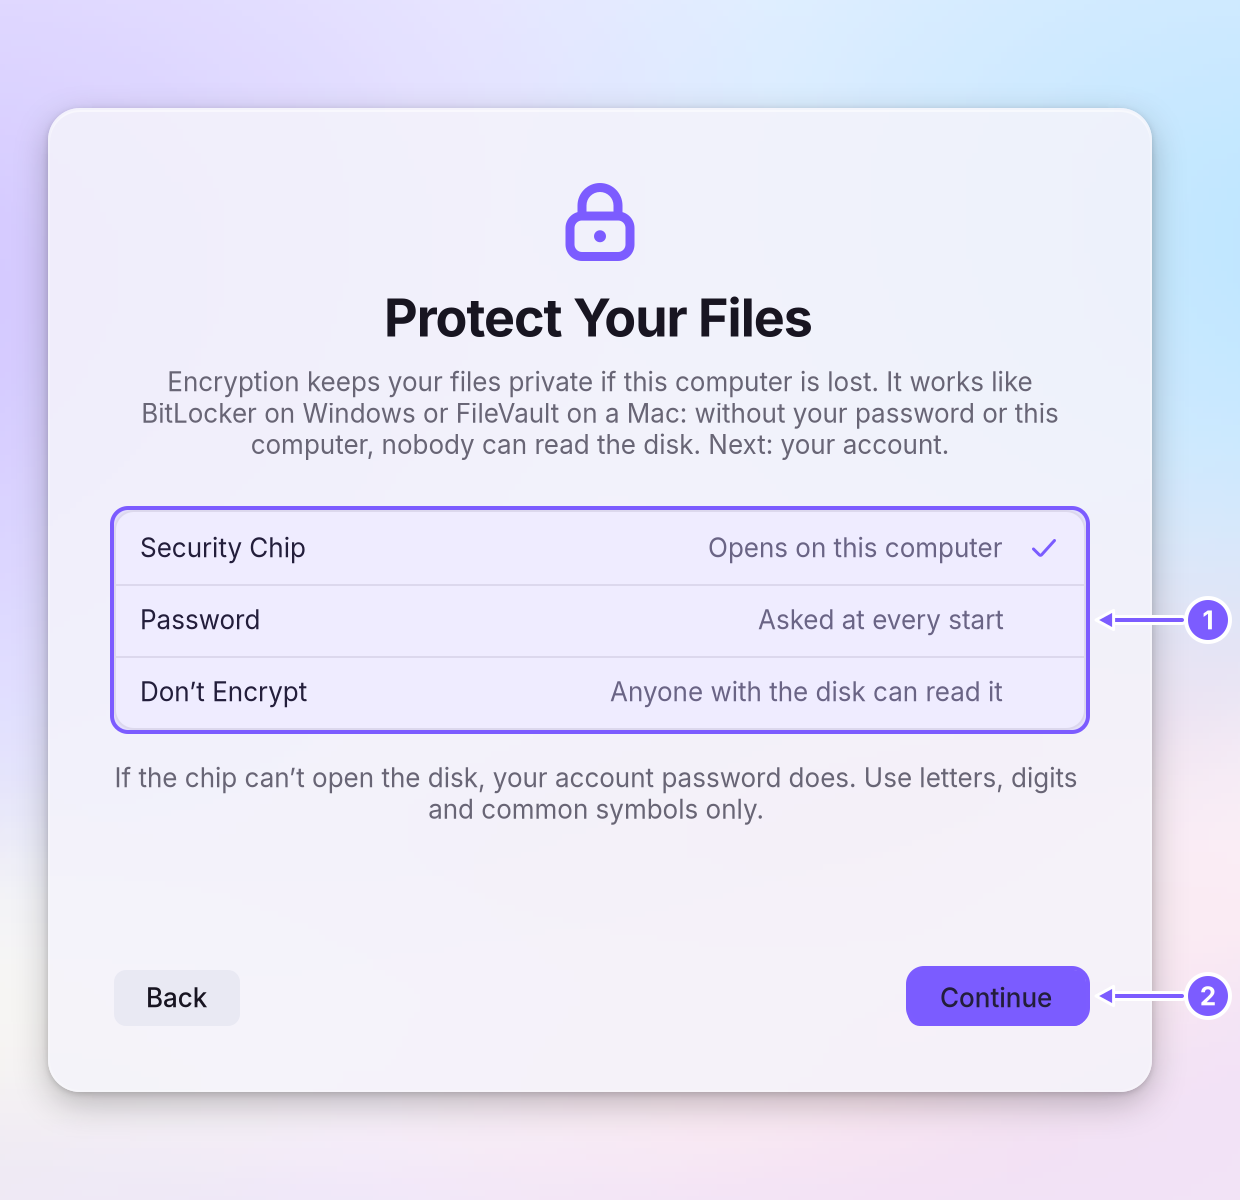
Choose encryption. You see "Encryption keeps your files private if this computer is lost." Pick Security Chip, Password or Don't Encrypt in the list (1), explained in the table below, then Continue (2). Scrambling the disk so it cannot be read without its key: your password, the security chip or the recovery key. works like BitLocker on Windows or FileVault on a Mac.
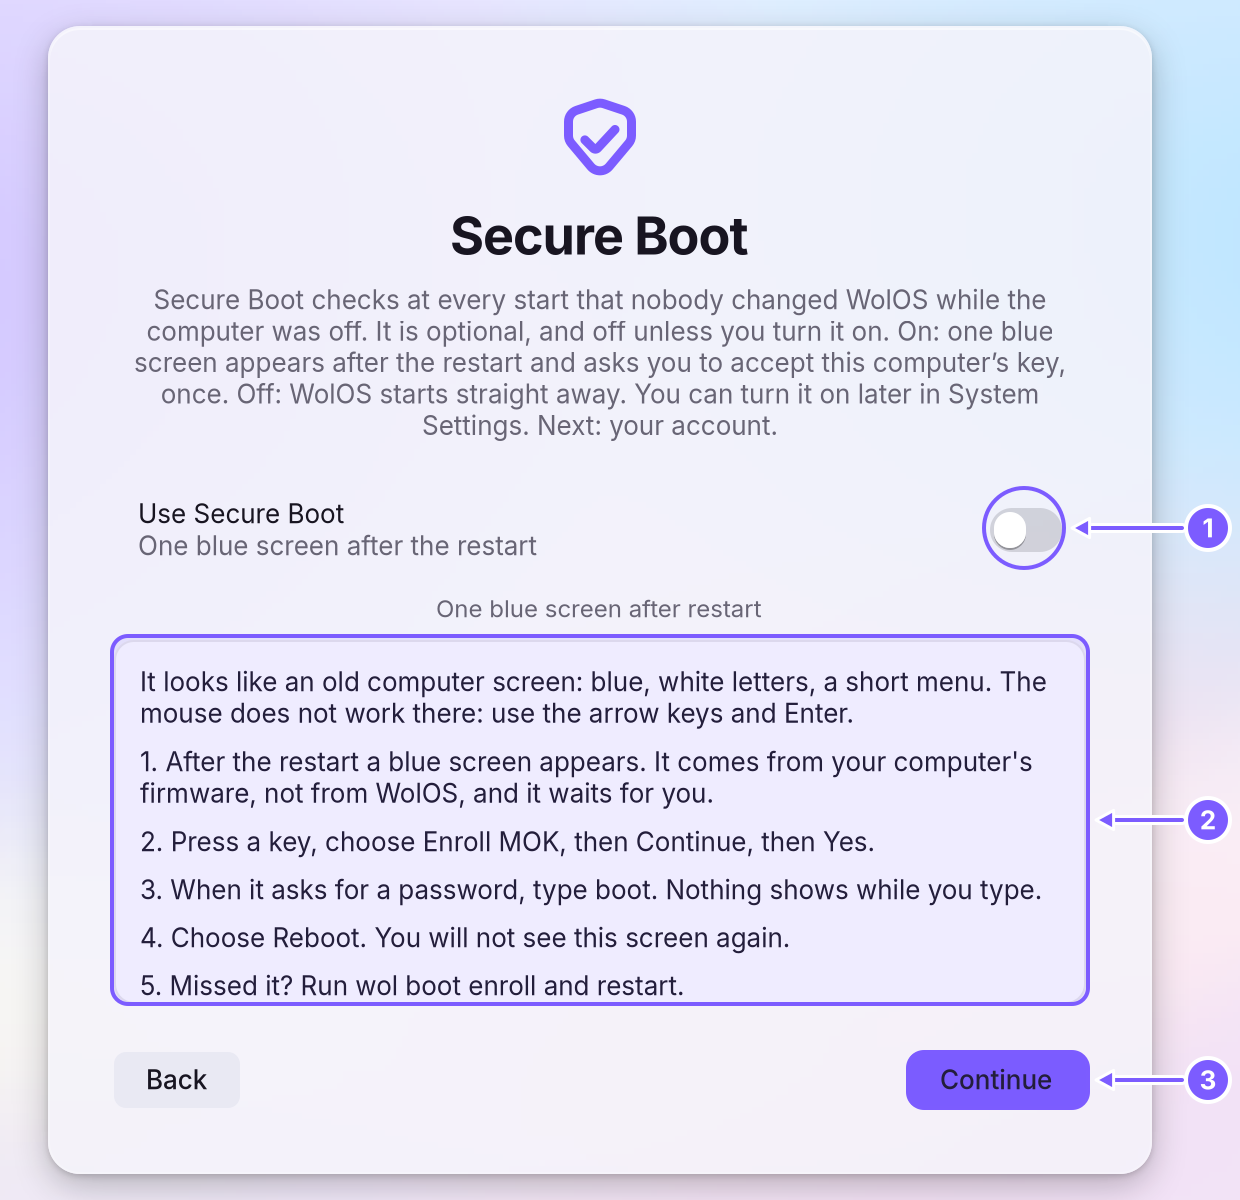
Choose Secure Boot. You see "Secure Boot checks at every start that nobody changed WolOS while the computer was off." The switch Use Secure Boot (1) is off unless you turn it on. With it on, the box below (2) shows the five steps of the one-time blue A blue screen from the computer itself, shown once, where you confirm that WolOS's key may be trusted. The password it asks for is boot. you will meet after the restart; read them now, because the mouse does not work there. Next to Windows with BitLocker the page also says what Windows will ask. Click Continue (3). Secure Boot explains the choice.
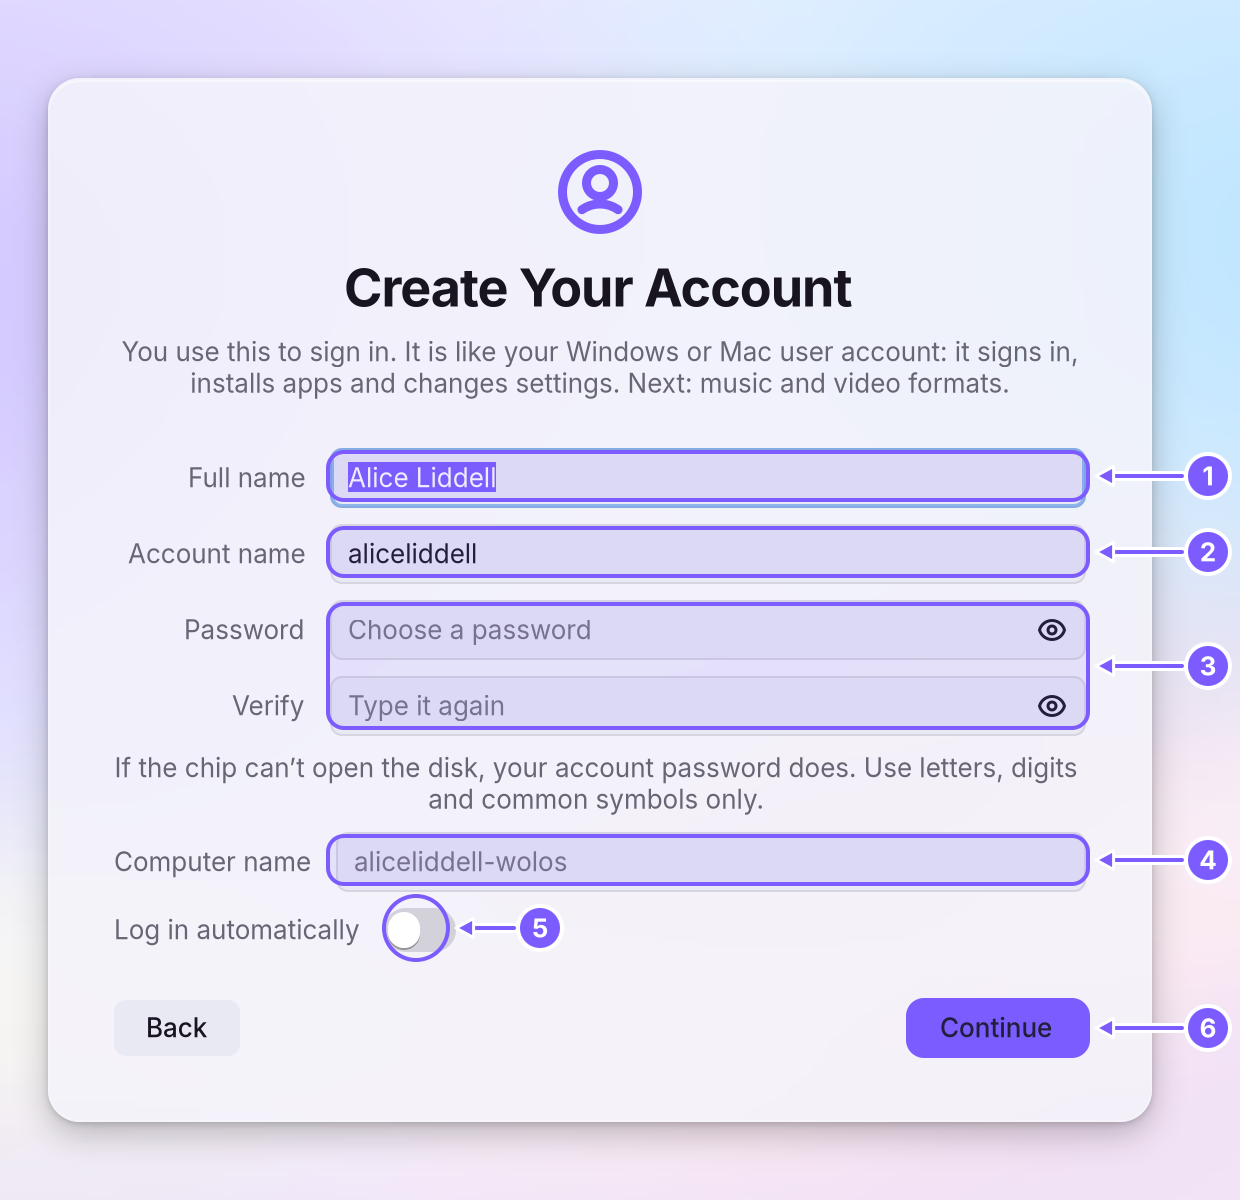
Create your account. You see "You use this to sign in." Type your Full name (1); the Account name (2) fills itself in from it (lowercase letters and digits, starting with a letter), and you can change it. Type a password of at least 8 characters twice (3); the eye button shows what you typed. The Computer name (4) is how other devices on your network see this computer. Log in automatically (5) skips the login window at start; leave it off on a laptop you carry. Click Continue (6). This account is an An account allowed to change things that affect everyone on the computer. The account you make while installing is one.: it can install apps and change any setting. A name the system already uses is refused.
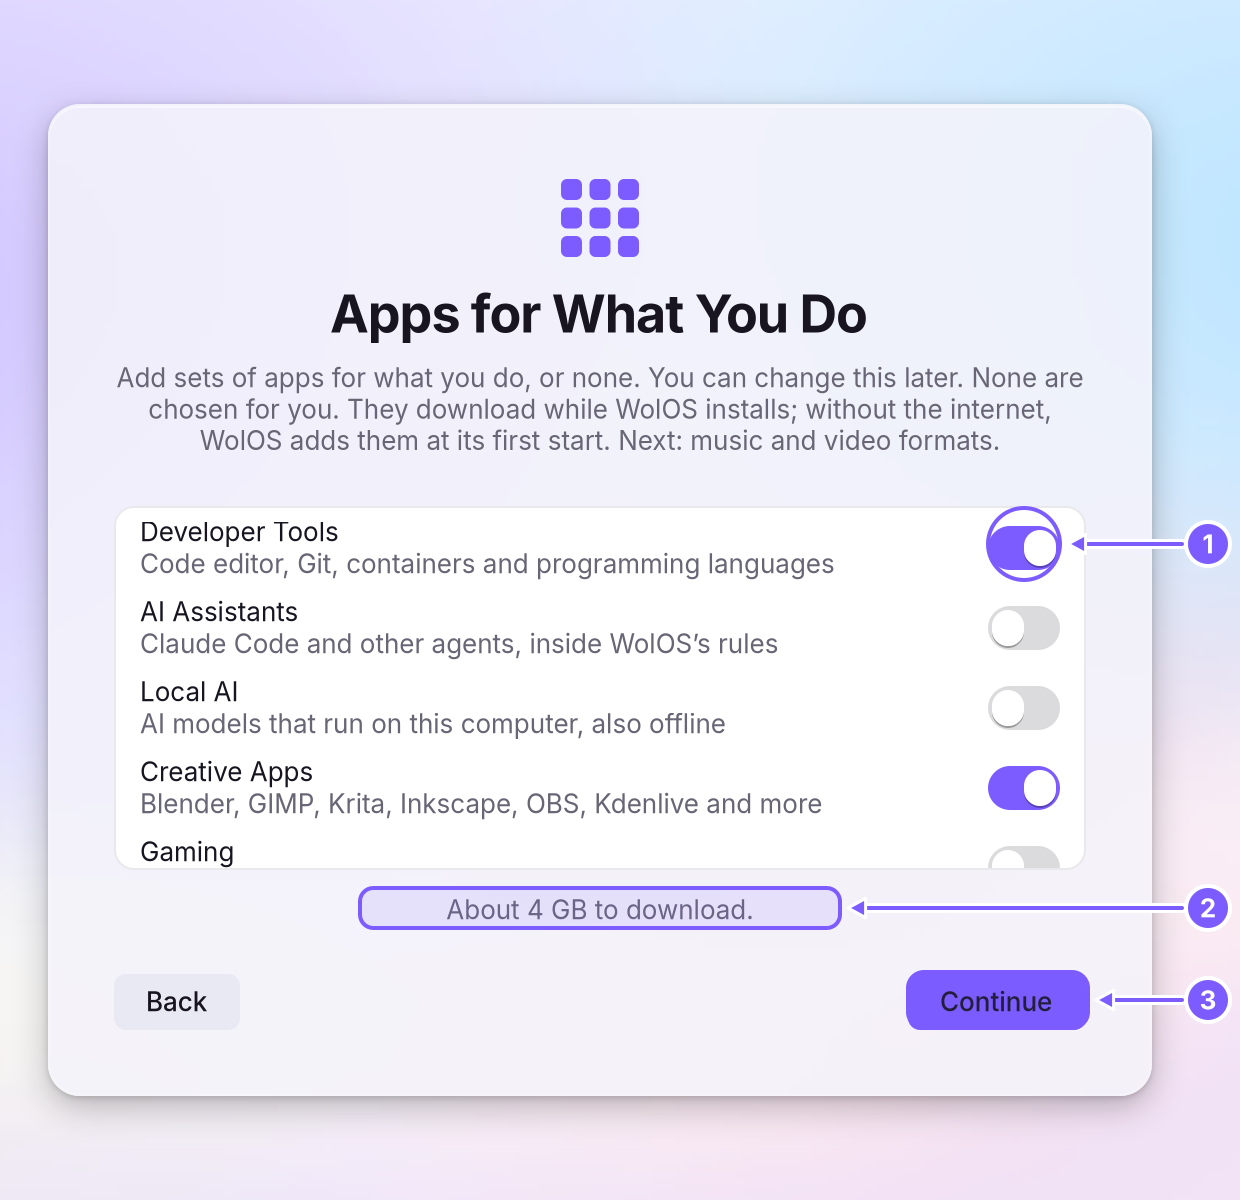
Pick modules (optional). You see "Add sets of apps for what you do, or none. You can change this later." Each An optional set of tools for one kind of work (development, creative work, gaming, AI) that you add or remove in Settings > Modules. has a switch (1): Developer Tools, AI Assistants, Local AI, Creative Apps and Gaming. None is on unless you turn it on. The line under the list (2) says how much the ones you turned on download. Click Continue (3). System Settings > Modules has these and two more (Sessions and Console) at any time; see Modules.
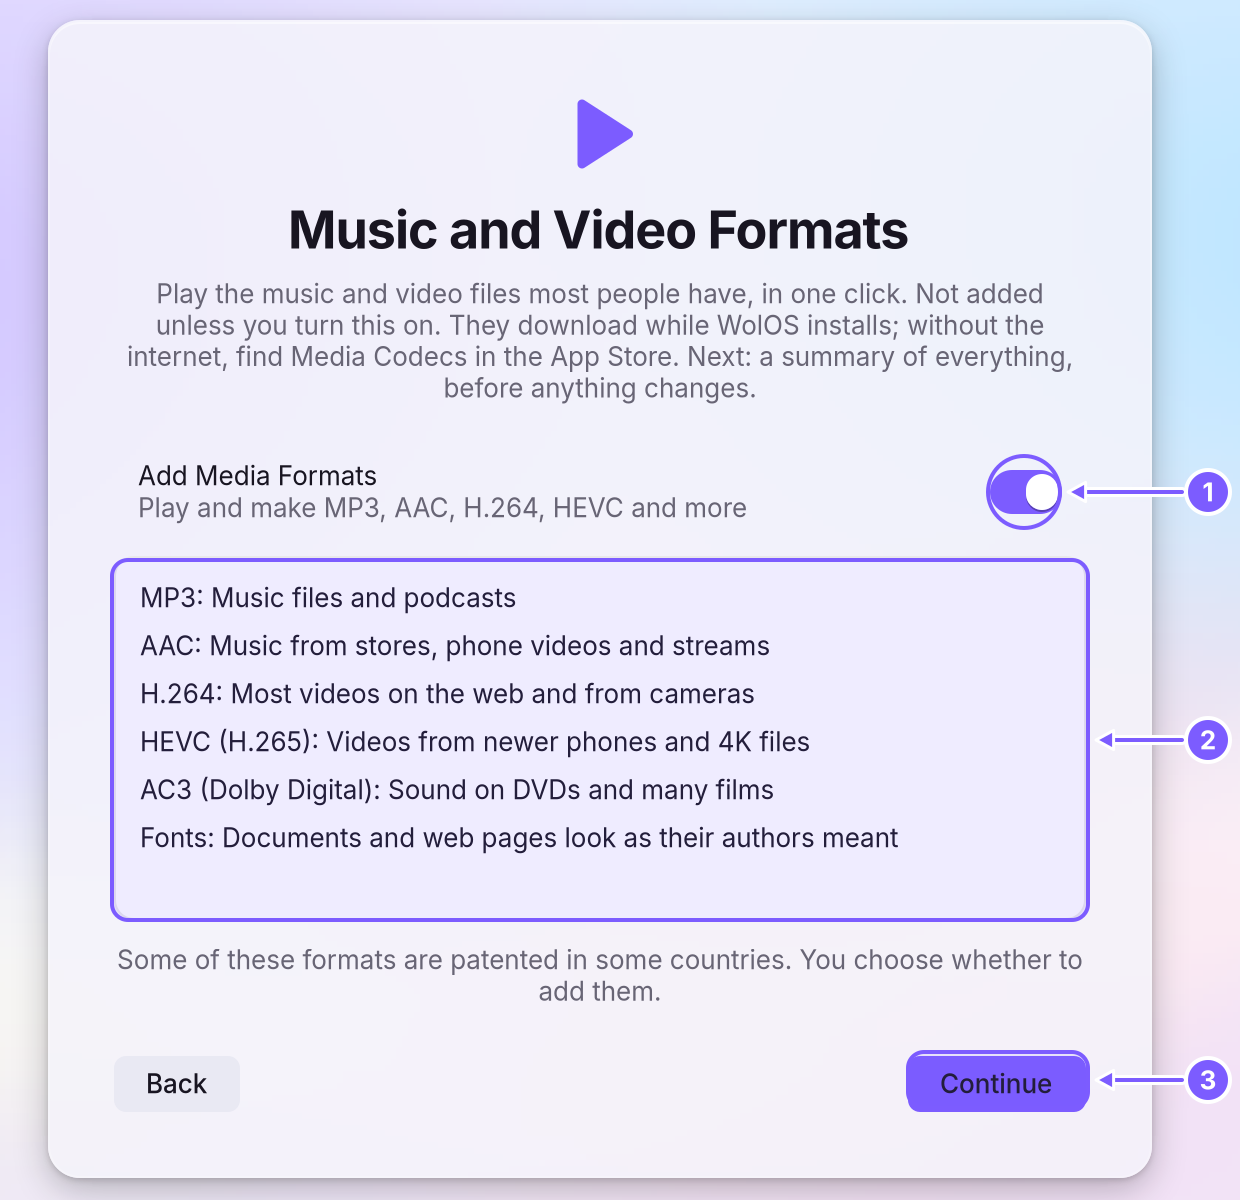
Add media formats (optional). You see "Play the music and video files most people have, in one click." The switch Add Media Formats (1) adds MP3, AAC, H.264, HEVC, AC3 and common fonts; the list (2) says what each is for. It is off unless you turn it on, because some formats are patented in some countries and the choice is yours. Click Continue (3). See Music and video formats.
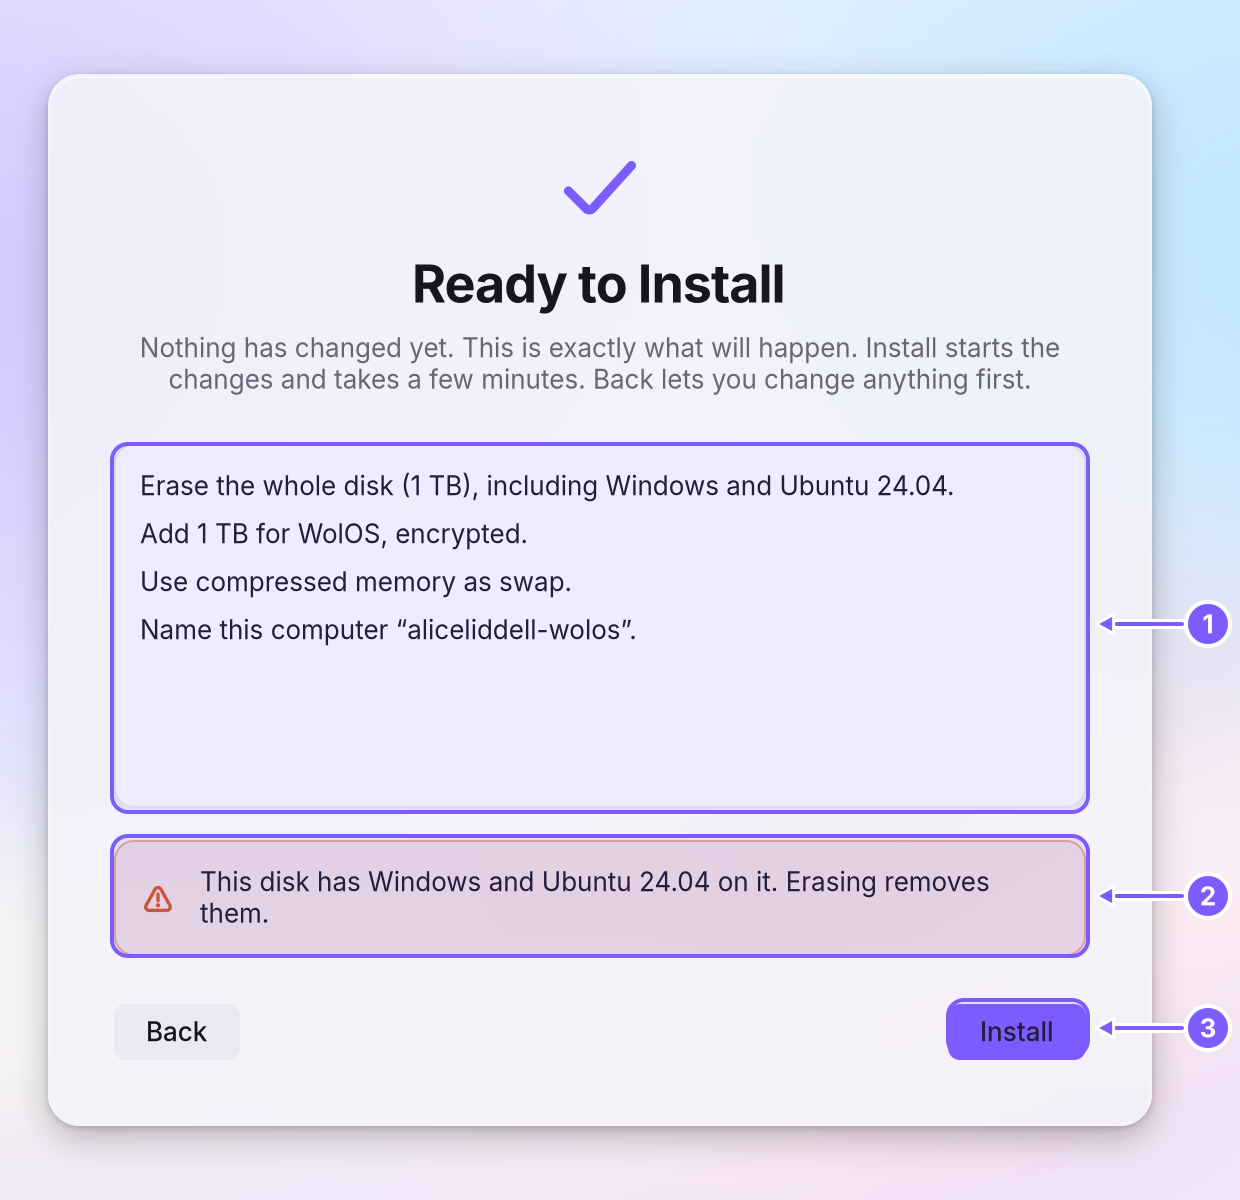
Read the summary. You see "Nothing has changed yet. This is exactly what will happen." The list (1) has one line per change: the disk and partitions, what is erased and what is kept, encryption, swap, the computer's name, modules and anything added later. A coloured box (2) repeats anything that removes something, such as another system on the disk. Read it all; Back changes anything. Install (3) starts writing.
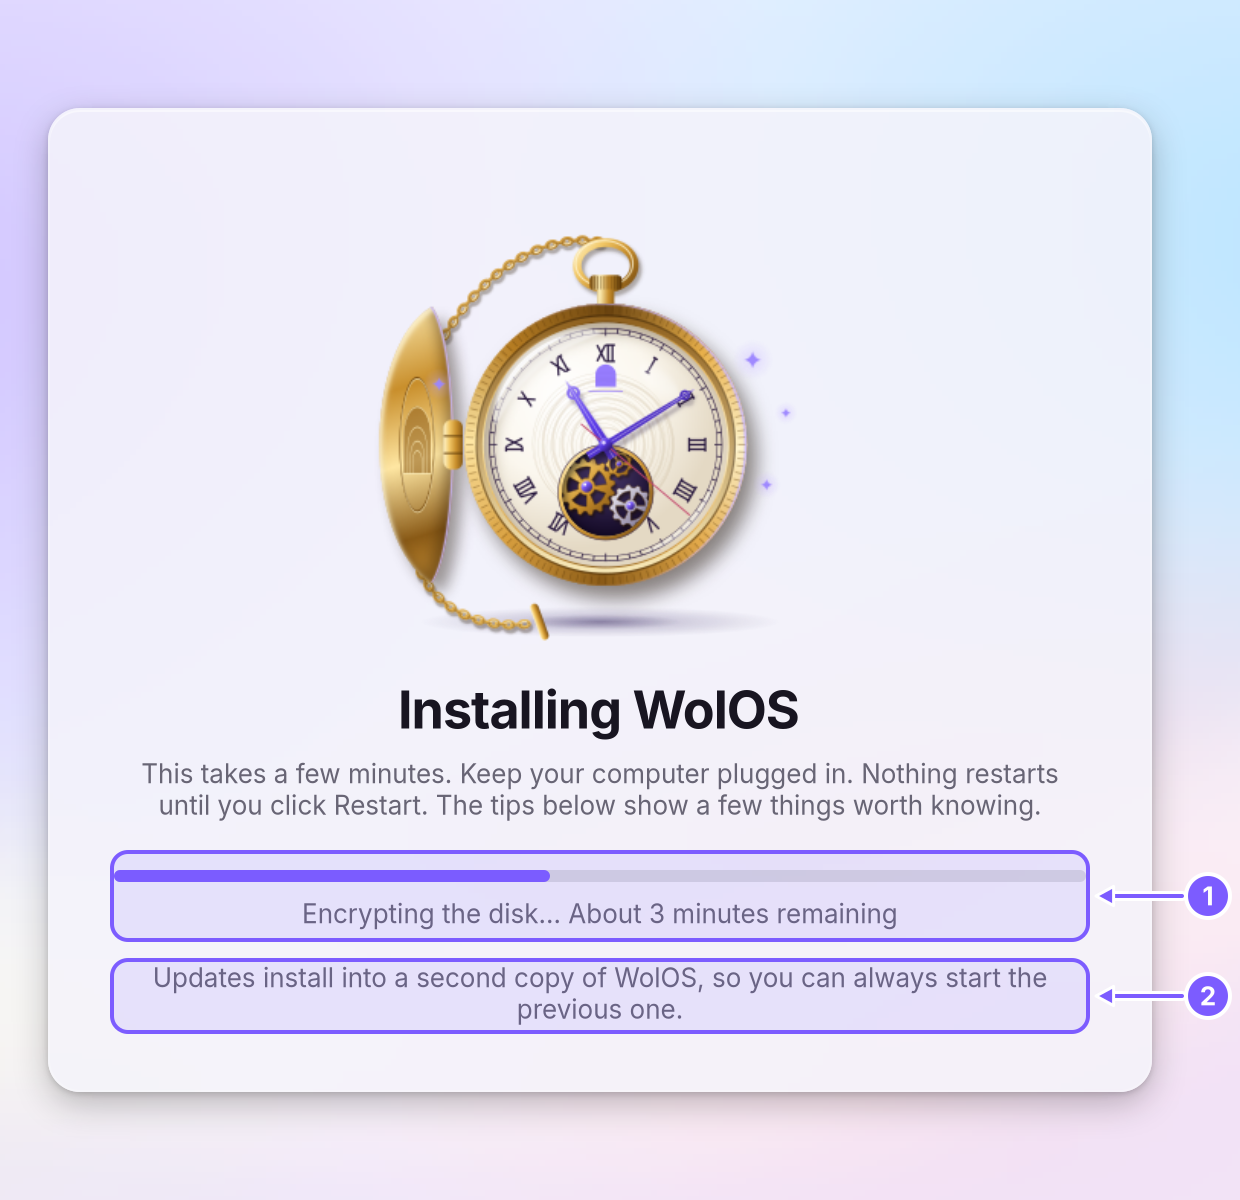
Wait. You see "This takes a few minutes. Keep your computer plugged in." The bar (1) shows the step it is on and the time left; below it (2), short tips about WolOS change every few seconds. Nothing restarts until you click Restart.
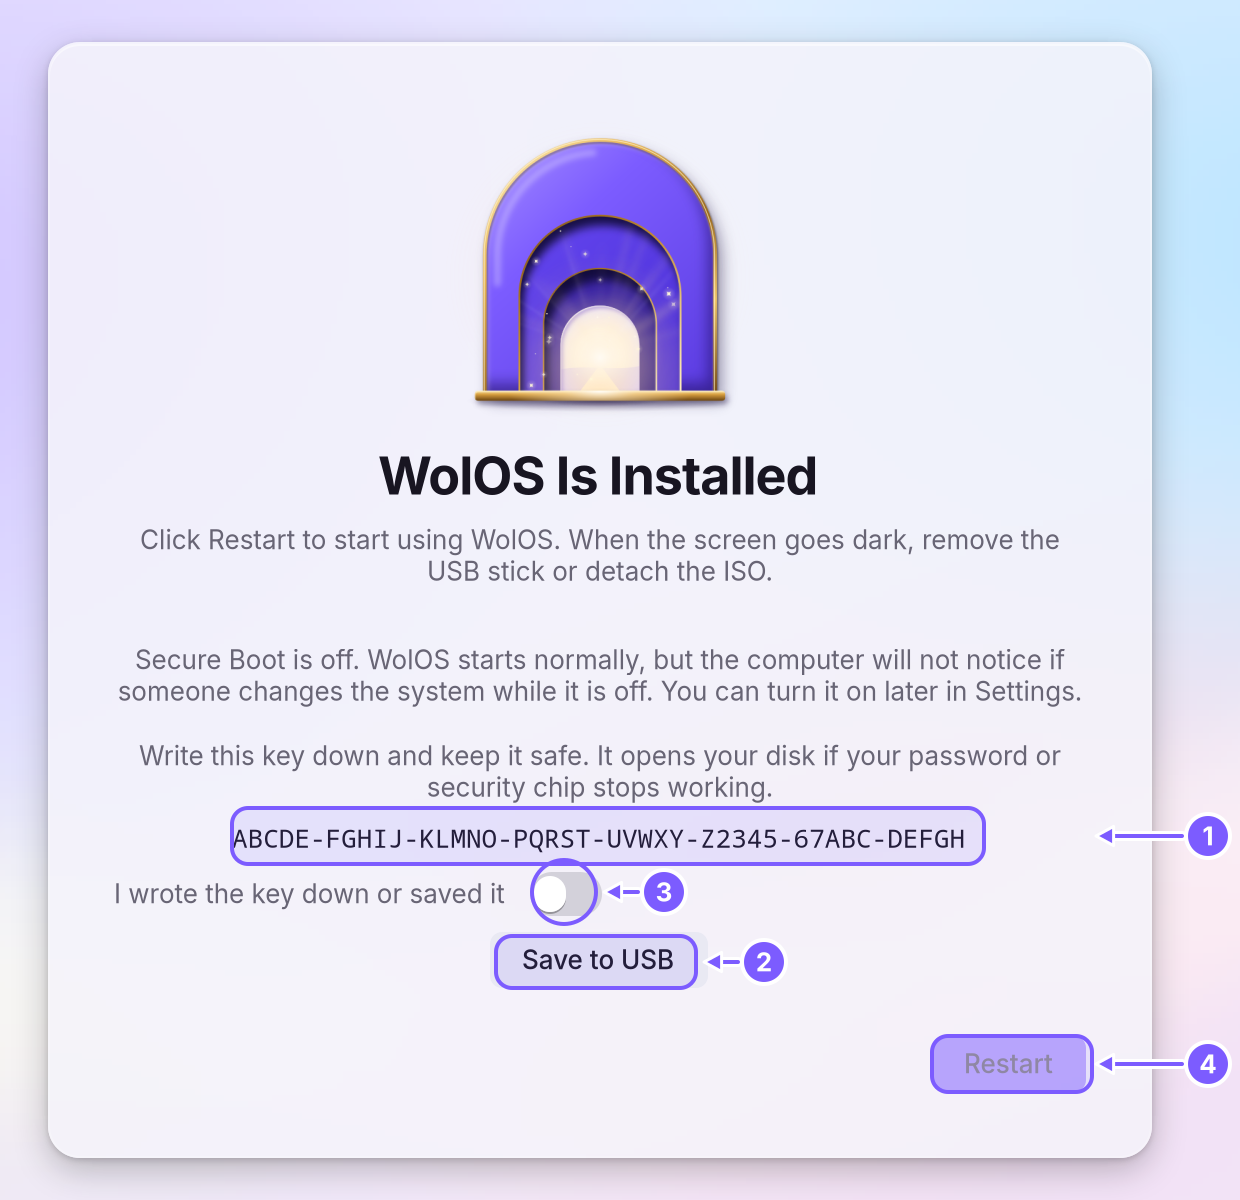
Restart. You see "Click Restart to start using WolOS. When the screen goes dark, remove the USB stick or detach the ISO." For an encrypted disk, your A long key shown once at the end of an encrypted install. It opens the disk if the password and the security chip both fail. Write it down. (1) is shown here, once. Write it down on paper, or put a second USB stick in and click Save to USB (2). Turn on I wrote the key down or saved it (3); Restart (4) stays grey until you do.
Encryption: password, security chip or none
| Choice | What it means |
|---|---|
| Security Chip (only shown when the installer finds a TPM) | The disk opens by itself on this computer. If the chip refuses (after a firmware or Secure Boot change), your account password opens the disk instead, and the next start is automatic again. |
| Password | The disk asks for a password at every start. It must be at least 8 characters. |
| Don't Encrypt | Anyone who takes the disk can read your files. The summary says so once more. |
The disk password is typed before any desktop exists, on a plain keyboard map. Use letters, digits and common symbols only: accented letters cannot be typed at that point, and the installer refuses a password it knows you could not type. Your keyboard layout is applied before that prompt, so the password you type at start is the one you chose. With the security chip, the account password you choose becomes the fallback, so it must be long enough and typable too.
The recovery key is a long machine-made key and opens the disk if both the password and the chip fail. It is shown once. Keep it off the computer. If the installer cannot read it at the end, a page says so and Try Again reads it before you restart; Restart waits until you have acknowledged the key.
Installing without a network
The installer works offline. The modules and media formats you ticked cannot download then, so the summary says which are added "at first start with a network" instead of promising more. They install in the background as soon as the network comes up, on Wi-Fi too, and the first start never waits for them. A module that cannot be installed is given up after five tries and is offered again in Settings > Modules under Could Not Be Added.
What the installer will never do
- Write to the medium it started from, a CD, or a read-only disk.
- Touch a partition the plan does not name. If the disk no longer matches the plan, it stops with "The disk changed since you chose it".
- Finish without checking that everything the computer needs to start WolOS is in place.
- Leave your passwords or your recovery key written on the disk: they are removed if an install stops, and the record of the install that stays on the computer never holds them.
After the install
The computer restarts into WolOS. With Secure Boot on, a blue key screen may come first (Secure Boot). Then the first start finishes setting up the The part of the system that knows how to talk to one kind of device, such as a graphics card or a printer. for your hardware (NVIDIA graphics drivers install online when an NVIDIA card is present) and any modules that were waiting for a network, and the login window appears. Your first day continues from there.
A layout made with Manual that does not use the system's own file system keeps one copy of the system instead of two, so an update cannot be undone by restarting; the installer says so on the summary.
A worked example
Alice puts the stick in an old laptop, starts it from the startup menu and clicks through the installer: language, the whole disk, a password for the disk, her name and a password for the account, no extra modules. She reads the summary, clicks Install and has a coffee. When it says WolOS is installed, she restarts, removes the stick and signs in to her new desktop.
If something goes wrong
| What you see | What it means and what to do |
|---|---|
| The disk list is empty ("No disk found") | The installer shows only disks it may write to. Connect the disk, then click Look Again; it checks again after you plug one in or free space. |
| "WolOS needs at least 16 GB" | Make more room or choose another disk. |
| "This disk uses an older layout. Only Erase Disk can use it." | The disk is divided the old way (from before UEFI). Use Erase Disk, or keep the other system and convert the disk with its own tools first. |
| "Windows didn't shut down fully" | Windows is hibernated or stopped by Fast Startup, so shrinking it could damage its files. Turn off Fast Startup in Windows, shut down fully, and start the installer again. |
| "BitLocker protects Windows here" | The installer cannot shrink a BitLocker partition. Turn BitLocker off in Windows, then try again. |
| macOS partition | Make room with Disk Utility in macOS, then start the installer again. |
| "The disk changed since you chose it" | Something else touched the disk after you chose it. Go back and choose it again. |
| "Use at least 8 characters" / "Passwords don't match" | The disk or account password is too short, or the two typings differ. |
| "That name is already used on this computer" | The account name belongs to the system. Choose another. |
| The Failed page (below) | The page names the step that failed ("The disk couldn't be prepared", "The system files couldn't be copied", "The disk couldn't be encrypted", "The startup files couldn't be installed", "Your settings couldn't be saved") and what to try. Details shows the end of the install log. When the installer refuses to go on, the page says why and that nothing on the disk was changed. |
| "WolOS is installed, but its recovery key could not be read" | The install worked. Click Try Again; Restart stays off until the key is shown. |
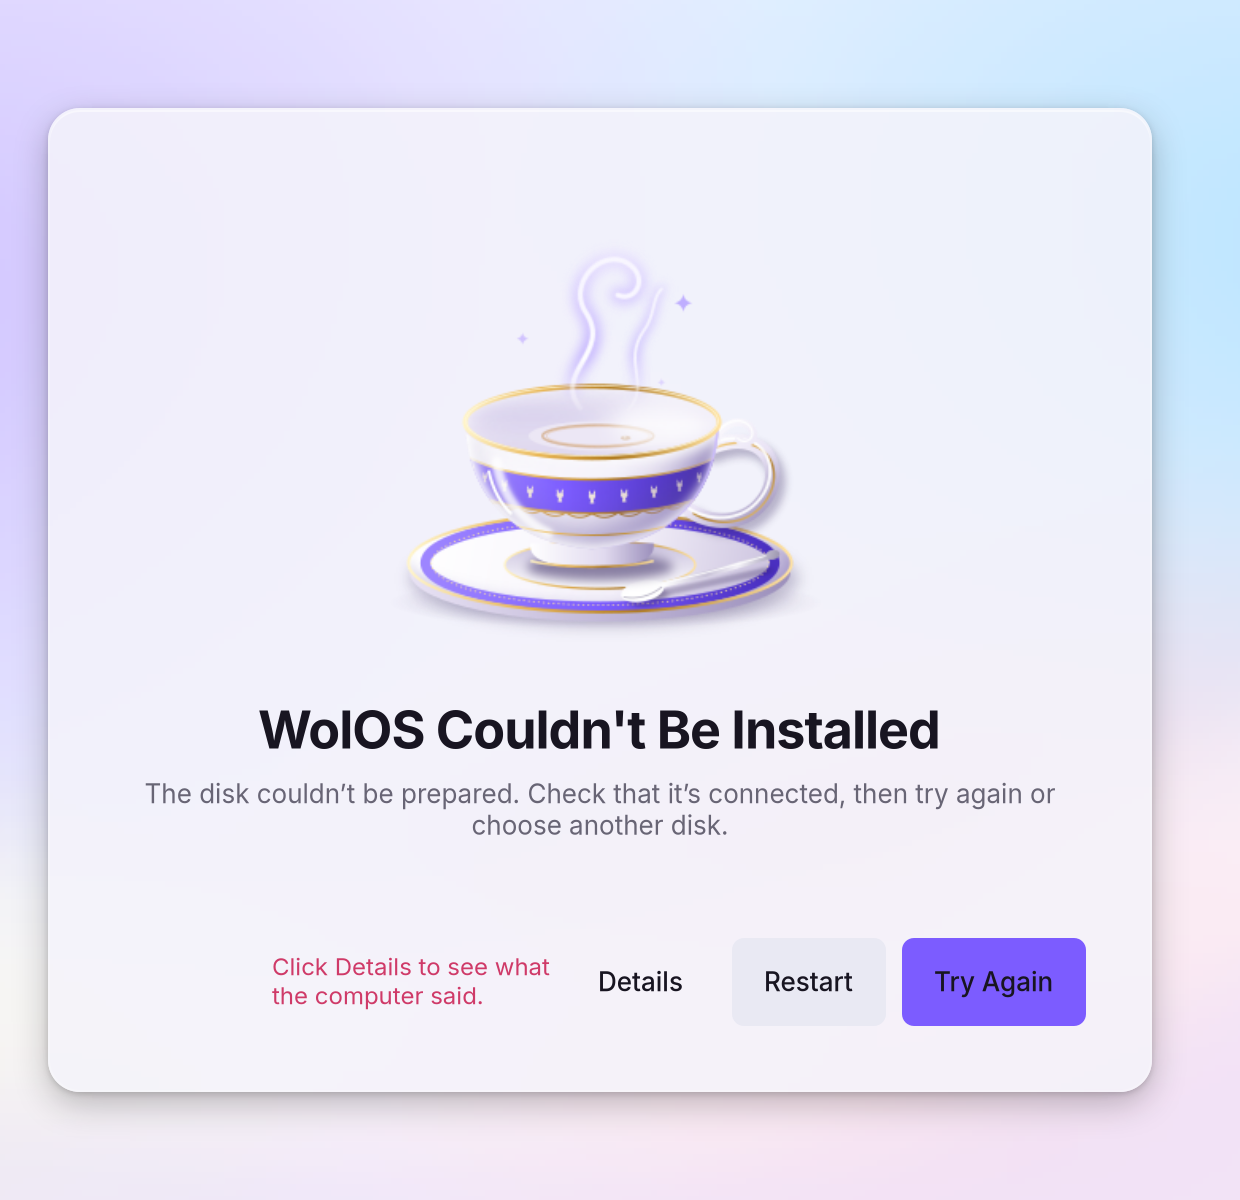
Still stuck? Click Details on the Failed page and take a photo of what it shows, then report it on GitHub. See also Recovery.
Related
- Getting startedWhat WolOS is, what you need, and the way from the download to your own desktop, in five steps.
- Secure BootAn option in the installer. Every computer makes its own start-up keys; at most one blue key screen, once, with the password boot.
- Installing next to Windows or LinuxShare a disk: your other system keeps its files, gets smaller, and you pick one at start. What to do first, and what to do when the installer refuses.
- Recovery: when something does not startThe disk will not unlock, an update went wrong, a screen stays black, or a setting broke the desktop. What WolOS does on its own and what you can do.
- Your first daySign in for the first time, finish the setup, and spend ten minutes making WolOS yours: Wi-Fi, updates, looks and your first apps.