
Everyday
Screenshots and markup
Pictures and recordings of the screen from the keyboard or the capture toolbar, and a pen to mark up a picture before you send it.
On this page
What it is
Four keys take a picture of the screen at once, and one more opens the capture toolbar, where you choose what to capture (the whole screen, a window, an area, or a recording) and where it goes. After a capture from the toolbar a thumbnail waits in the corner for a few seconds; its pen button opens Markup, where you draw on the picture before you save or copy it.

Why
A screenshot is usually taken to show someone something, now. So the keys need no setup and no dialog, the picture lands where you will find it (the Desktop), and the common next step, circling the thing you mean, is one click away instead of another app. Only WolOS's own tools can copy the screen without asking; any other app has to ask each time (Privacy and permissions).
How
From the keyboard
| Keys | Does |
|---|---|
| Shift+Super+3 (or Print) | Saves a picture of the whole screen to the Desktop. |
| Shift+Super+4 | Lets you drag over an area, then saves a picture of it. Esc cancels. |
| Ctrl+Shift+Super+3 | Copies a picture of the whole screen, no file. |
| Ctrl+Shift+Super+4 | Copies a picture of the area you drag, no file. |
| Shift+Super+5 | Opens the capture toolbar. |
A saved picture is named "Screenshot" with the date and time, is also put on the Where a copied text or picture waits until you paste it. WolOS keeps a history of the last 25 things you copied., and a A short message from an app or from WolOS. It shows for a moment as a banner at the top right, then waits in Notification Center. names the folder it went to (for example Screenshot saved to Desktop). A copy-only capture says Copied to clipboard.
The capture toolbar
- Open it with Shift+Super+5, or the Screenshot tile in The panel behind the icon at the top right of the menu bar: Wi-Fi, Bluetooth, Focus, brightness, sound and quick switches.. The Record tile opens it ready to record the whole screen.
- Pick a mode. From left to right: Capture Entire Screen, Capture Selected Window, Capture Selected Portion, Record Entire Screen, Record Selected Portion. Hover a button to see its name.
- Options sets where it goes (Save to: Desktop, Pictures or Clipboard) and a Timer (None, 5 or 10 seconds).
- Press Capture (or Return). The button reads Record in a recording mode. Esc or the close button leaves without capturing.
Pictures saved to Pictures go to Pictures/Screenshots. Recordings go to the Desktop, or to Movies when you chose Pictures, and are named "Screen Recording" with the date and time. To stop a recording, start a recording again (the toolbar or the Record tile); a notification says where it was saved.
Markup
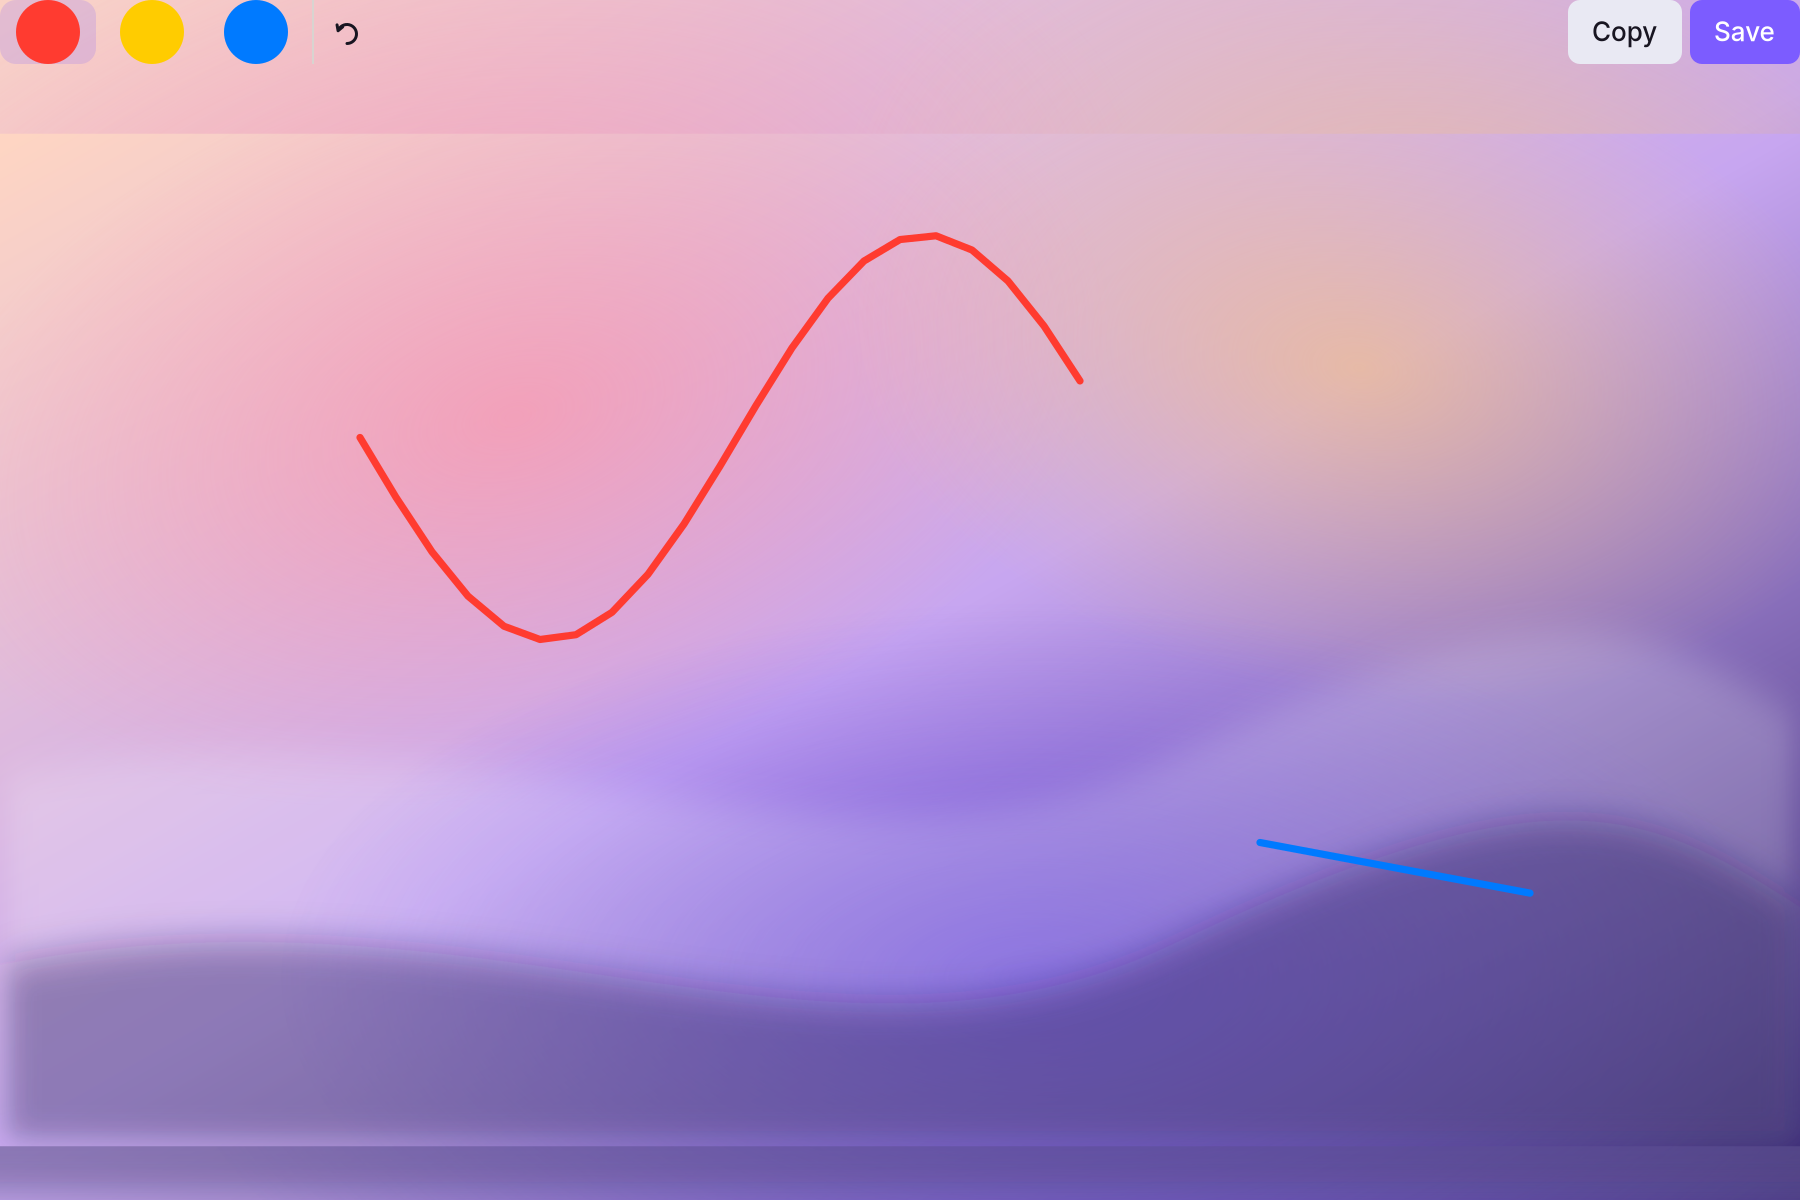
After a capture from the toolbar, a thumbnail shows at the bottom right for five seconds. Click its pen button.

Draw. Choose Red, Yellow or Blue and drag over the picture. Undo takes back the last stroke.
Save writes a marked-up copy next to the original, named like the original with "(Markup)" added. The original is never changed. Copy puts the marked-up picture on the clipboard instead.
A worked example
Alice wants to show a friend an error message. She presses Shift+Super+4, drags a box around the message and lets go: the picture is on her Desktop and on the clipboard. For a longer explanation she presses Shift+Super+5, picks the area mode, clicks Capture, then clicks the pen on the thumbnail and circles the right button in red. Copy puts the marked-up picture on the clipboard, ready to paste into the chat.
If something goes wrong
| What you see | What to do |
|---|---|
| Nothing happens after Shift+Super+4 | It is waiting for you to drag over an area. Esc cancels. |
| The toolbar is in the picture | It never should be: it hides before the capture. If a Timer was set, the capture waits that long. |
| No thumbnail after a capture | The thumbnail follows captures from the toolbar that make a file. With Save to Clipboard there is no file, so no thumbnail; paste the picture instead. |
| A recording does not stop | Start a recording again from the toolbar or the Record tile: that ends the one running and saves it. |
| The shortcuts do something else | Check Settings > Keyboard > Keyboard Shortcuts, group Screenshots, where you can change them. |
Related
- Privacy and permissionsWhat apps may use and how you allow it, the questions WolOS asks on screen, the firewall and the malware check, and where to take any permission back.
- Control CenterThe panel at the top right for the things you change every day: Wi-Fi, Bluetooth, Focus, Dark Mode, brightness, sound, music and quick switches.
- The desktopThe menu bar, the Dock, windows, Search, switching apps and the four desktops: what each part of the screen is for and how to use it.
- Playing full screenWhat WolOS does while a game fills the screen: banners wait, frames go out at once, the refresh rate follows the game, and Force Quit still opens.
- Night ShiftWarmer screen colours for the evening, on and off from Control Center, the keyboard or System Settings > Displays.